|
|

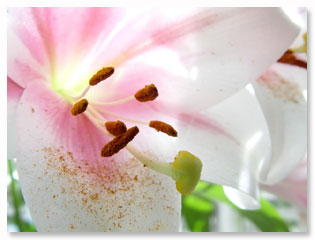
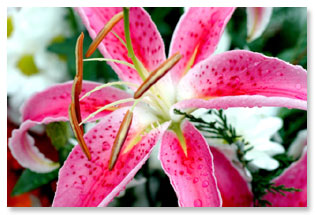
For the most part, we photograph landscapes and capture a sea of colors. But there is a world as mesmerizing as a scenic panorama. And that is the microscopic world—a close up of nature and things.
Photographing in the macro mode is like looking at your subjects under a magnifying glass. The closer you get, the more dramatically magnified your subjects will be. Where even the smallest detail or grain comes to life and sparks the imagination.
What are the things you should remember before and during taking digital macro photography?
First, set your camera to the macro mode
The macro mode is usually identified by the flower icon. In this mode, your camera rearranges the optics so you can get within just a few inches of your subjects.
For the exact number of inches, check your camera's manual. Or if it's not in your manual, experiment by taking photos at different inches away from your subject. See at which point your subject comes out blurry.
Next, consider your lighting
Will you use natural light and turn off your flash or will you use other light sources such as a ring flash?

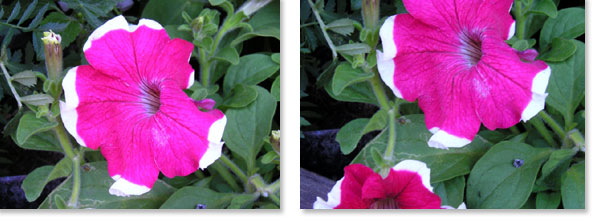
If you're too close to your subject, don't use the flash from your camera. It will over expose your subject, cast dark shadows behind it, and make the photo look unnatural. Like the photo on the right:
If you must use flash, fire your flash at a lower light (some cameras allow this). Or better still, use a ring flash unit that can be mounted in front of a lens and provides even lighting.
"How about if I use natural light and turn off flash instead?"
That is advisable, provided there's enough natural light to illuminate the scene properly. Not too harsh as in during midday, and not too little as during twilight.
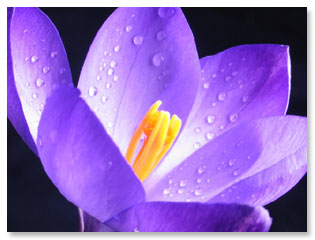
Here's an example of a digital macro picture taken with flash off:

It's best to take digital macro photos early in the morning while the wind is calm and the flowers and plants are covered with dew.

Tip: Want to add the effect of early morning dew? Position a plant mister a few inches away from the flowers then spray some water on them. This will cover the flowers with tiny water droplets, and make them look fresh and more beautiful.
Keep in mind, though, that if the light is not enough, the camera compensates by opening the shutter longer to allow more light.
A slower shutter speed exaggerates the effect of camera shake. So be sure to use a tripod or lean against any steady surface to minimize—or better yet, eliminate—camera shake.
Aside from using a tripod or monopod in digital macro photography, you can further minimize camera shake by using the self-timer or a remote control feature so that you finger doesn't jab at the shutter.
Next consideration? The lens
If you have a macro lens or a zoom lens, then they will come in handy in digital macro photography. If not, you can still take beautiful macro shots using the lens contained in your camera.
Just mount your digital camera on a tripod, set your camera in the macro mode, maximize the optical zoom settings, then take your picture.
Tip: What if your camera won't allow you to get close enough to your subject? Take the macro photo in the highest resolution your camera is capable of, then crop the digital photo using your favorite image editing software.
To get closer to your subject without editing your picture in the computer, you might want to add screw-on macro lenses, typically 50mm or 100mm in focal length.
But make sure that what you see is exactly what the camera captures. So...
Compose your image using the LCD
It's especially critical in digital macro photography that you compose your subject using the LCD instead of the viewfinder. This is because what you see in your viewfinder is not the exact image captured by your camera lens.
The subject is not where I positioned it to be and parts of the photo are cut off. This is known as the parallax error.
Take a look at the ff photos:

The photo on the left is what I saw in my viewfinder, but when I took the picture and checked it through the LCD, it looked like the right photo.
You would have wasted preparing for that macro shot if the photo turned out cropped. You can avoid the above mistake by using your LCD to compose your picture.
Another thing, the depth of field is narrow in digital macro photography
Aside from keeping the camera as steady as possible, try to focus on the most important part of the scene because the depth of field (the front-to-back range in the picture that can be in sharp focus) in the macro setting is narrow. Let's say you're photographing a flower, focus on the stamens or pistils inside. Your subject or the one you focused on is sharp, while the background is blurry.

What if your camera only takes deep depth of field, as most point and shoot cameras do?
That's ok. Just take the photo and edit it in your computer later. Open it in an image editor like Adobe Photoshop, then blur the background. The resulting photograph will look like it's been taken with a narrow depth of field.
A narrow depth of field has its advantage, too. Your subject stands out from the picture, and distractions from the background are minimized if not eliminated.
To focus on the most important element of your picture, press the shutter halfway. Then press it all the way to take the photo.
To summarize...
Here are the main things you should remember in digital macro photography:
- Change the settings of your camera to the macro mode. If you are using additional lens, attach it now.
- To keep your camera steady, mount your camera on a tripod. Then position it really close to your subject, but still within the acceptable focusing distance.
- Make sure there's enough natural light. If not, try to use a flash that doesn't over expose your photo.
- Compose your picture using your LCD instead of the viewfinder.
- Focus on the most important element in the scene to keep it sharp, because the depth of field is narrow. Press the shutter halfway to focus. Then press all the way to capture the shot.
That's it! Practice and enjoy your adventures in digital macro photography. Next time you're looking for interesting subjects, don't forget those that are right under your nose. :-)
To take your digital macro photography to the next level, and for more stunning flower photography tips, you might want to check out
Amy Renfrey's Digital Photography Success ebook.
Return from Digital Macro Photography to the Home Page